This document shows you how to use Android Studio to build an application .apk for
testing or release and how to run your application on an emulator or a real device.
Build your Project in Android Studio
To build the project on Android Studio, click Build and select Make Project. The status bar at the bottom of the window shows the current progress of the build:
Gradle: Executing tasks: [:app:assembleDebug, :lib:bundleDebug]
Click  on the bottom
right part of the window to show the Gradle Console, as shown in figure 2.
on the bottom
right part of the window to show the Gradle Console, as shown in figure 2.
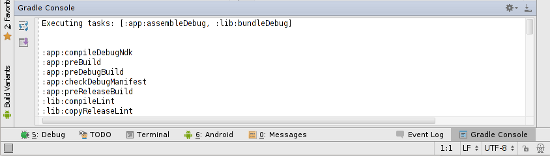
Figure 2. The Gradle Console in Android Studio.
The Gradle Console shows the build tasks and subtasks that the build system runs for
Android Studio. If the build fails, you can find more details on the console. To hide the Gradle
Console, click again.
If your project uses product flavors, Android Studio invokes the task for the selected build variant. For more information, see the Build System guide.
To view the list of all available build tasks in Android Studio, click Gradle on the right side of the IDE window. The Gradle tasks panel appears as shown in figure 3. Double-click any build task to run it in Android Studio. To hide the Gradle tasks panel, click Gradle again.

Figure 3. The list of build tasks in Android Studio.
Build a release version
You can now build the release version of your application for distribution. To build it from Android Studio:
- Click Gradle on the right side of the IDE window.
- On the All tasks section of the sidebar that appears, expand BuildSystemExample.
- Expand :app and double-click assembleRelease.
You can use this procedure to invoke any build task from Android Studio.
The build generates an APK for each build variant:
the app/build/apk/ directory contains packages named
app-<flavor>-<buildtype>.apk; for example, app-full-release.apk and
app-demo-debug.apk.
For more build system information, see Build System.
Running your app
This section shows you how to run your application on an emulator or a real device from Android Studio—all of which is done using the debug version of your application. For more information about how to sign your application with a private key for release, see Signing Your Applications
Creating a Run Configuration
The run configuration specifies the module to run, package to deploy, Activity to start, target device, emulator settings, and Logcat options. Run configuration can be set at the project, default, and module levels. When you first run a module as an Android Application, Android Studio will automatically create a run configuration. The default run configuration will launch the default project Activity and use automatic target mode for device selection (with no preferred AVD). If the default settings don't suit your project or module, you can customize the run configuration or even create a new one.
To create or modify a run configuration, see the IntelliJ documentation on Run/Debug configurations.
The following steps highlight the important things you need to do for an Android project:
- Open Edit Configurations from the Run Menu.
- Expand the Android Application item and create a new configuration or open an existing one.
- With the Run Configuration selected, adjust your desired run configuration settings:
- In the General tab, specify the Module settings to launch. In Target tab, consider whether you'd like to use Manual or Automatic mode when selecting an AVD to run your application. See the following section on Automatic and manual target modes).
- In the Emulator tab, specify any emulator options to the Additional Emulator Command Line
Options field. For example, you could add
-scale 96dpito scale the AVD's screen to an accurate size, based on the dpi of your computer monitor. For a full list of emulator options, see the Android Emulator document. - In the Logcat tab, set the LogCat options for the application.
Automatic and manual target modes
By default, a run configuration uses the automatic target mode in order to select an AVD. In this mode, Android Studio will select an AVD for the application in the following manner:
- If there's a device or emulator already running and its AVD configuration meets the requirements of the application's build target, the application is installed and run upon it.
- If there's more than one device or emulator running, each of which meets the requirements of the build target, a device chooser is shown to let you select which device to use.
- If there are no devices or emulators running that meet the requirements of the build target, Android Studio looks at the available AVDs. If there is an AVD that matches the build target of the project, Android Studio chooses that AVD. If the AVD versions are newer than the build target of the project, Android Studio chooses the oldest possible version of an AVD that meets the project or module build target requirement.
- If there are no suitable AVDs, the application is not installed and a console error warning tells you that there is no existing AVD that meets the build target requirements.
However, if a "preferred" AVD is selected in the run configuration, then the application will always be deployed to that AVD. If it's not already running, then a new emulator will be launched.
If your run configuration uses manual mode, then the "device chooser" is presented every time that your application is run, so that you can select which AVD to use.
Running on the emulator
Before you can run your application on the Android Emulator, you verify the default AVD or create an AVD.
To run (or debug) your application, select Run > Run (or Run > debug) from the Android Studio menu bar. Android Studio automatically creates a default run configuration for the project. Android Studio will then perform the following:
- Compile the project (if there have been changes since the last build).
- Create a default run configuration (if one does not already exist for the project).
- Install and start the application on an emulator (or device), based on the Deployment
Target defined by the run configuration.
By default, Android run configurations use an "automatic target" mode for selecting a device target. For information on how automatic target mode selects a deployment target, see Automatic and manual target modes above.
If you run the application with Debug, the Choose a Device option appears so you can select an attached device or emulator. Once the device or emulator is selected, Android Studio opens the Debug console and starts the application's main activity. Otherwise, if you run the application with the normal Run command, Android Studio installs the application on the device and launches the main activity.
To set or change the run configuration used for your project or module, select Run > Edit Configurations. See the section below about Creating a Run Configuration for more information.
Be certain to create multiple AVDs upon which to test your application. You should have one AVD for each platform and screen type with which your application is compatible. For instance, if your application compiles against the Android 4.0 (API Level 14) platform, you should create an AVD for each platform equal to and greater than 4.0 and an AVD for each screen type you support, then test your application on each one.
Running on a device
Before you can run your application on a device, you must perform some basic setup for your device:
- Ensure that your application is debuggable by setting the
android:debuggableattribute of the<application>element totruein the build.gradle file. - Enable USB debugging on your device.
- On most devices running Android 3.2 or older, you can find the option under Settings > Applications > Development.
- On Android 4.0 and newer, it's in Settings > Developer options.
Note: On Android 4.2 and newer, Developer options is hidden by default. To make it available, go to Settings > About phone and tap Build number seven times. Return to the previous screen to find Developer options.
- Ensure that your development computer can detect your device when connected via USB
Read Using Hardware Devices for more information.
Once set up and your device is connected via USB, install your application on the device by selecting Run > Run (or Run > Debug) from the Android Studio menu bar.